
Hey Everyone! I know that I said the art project would be here yesterday, but I got behind on work, so I had to post it today! Please don't hate me!!
This project was really fun, and you have seen some similar projects floating around the blogs, but this one is a little different. I call it the Patchwork Canvas. Ohh...and I want to thank my awesome sister and my mom for helping out with this project while I snapped photos of them working! :)
Here is what you will need to get started:
--Canvas (any size you would like, I used 11X14's)
--Black Grosgrain Ribbon** (see how to get this at the bottom of page)
--Scrap booking Paper (as many different patterns as you want)
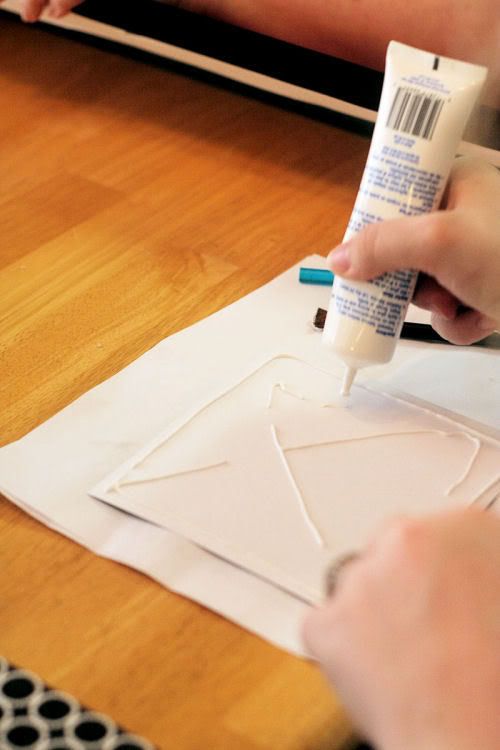
--Fabric Glue (VERY important that it is fabric glue, not regular glue, believe me, I tried all different kinds of glue and this works best!)
--Hot Glue Gun
--Paper Towels
--Small paint brush with stiff bristles
Here is how to make it:
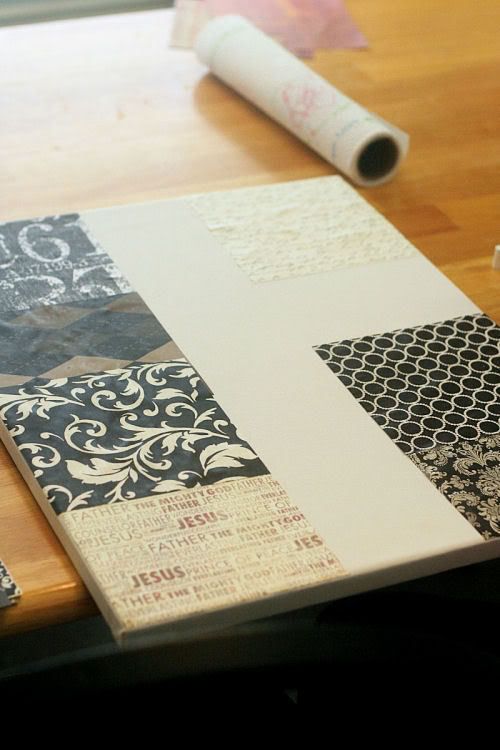
STEP 1:
Cut your paper into 4 squares (a 12X12 paper can be cut into four 6X6 squares) Then choose an assortment to place on your canvas. Lightly Coat the back of the paper with the fabric glue.
STEP 2:
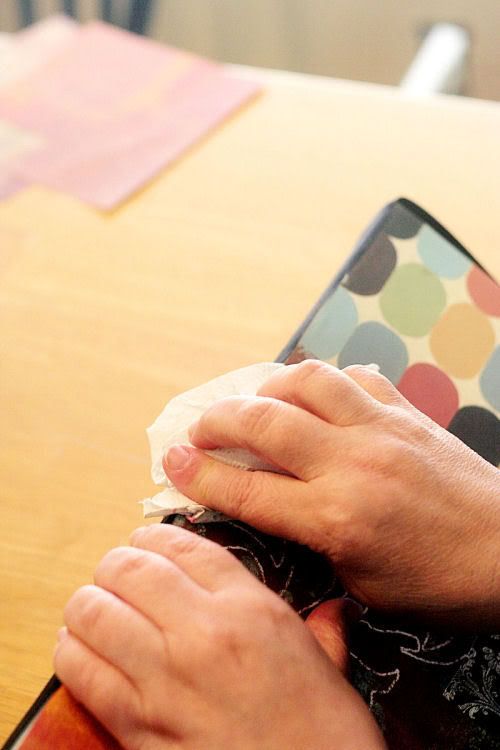
Spread the glue around the back in an even coat with the paint brush.
STEP 3:
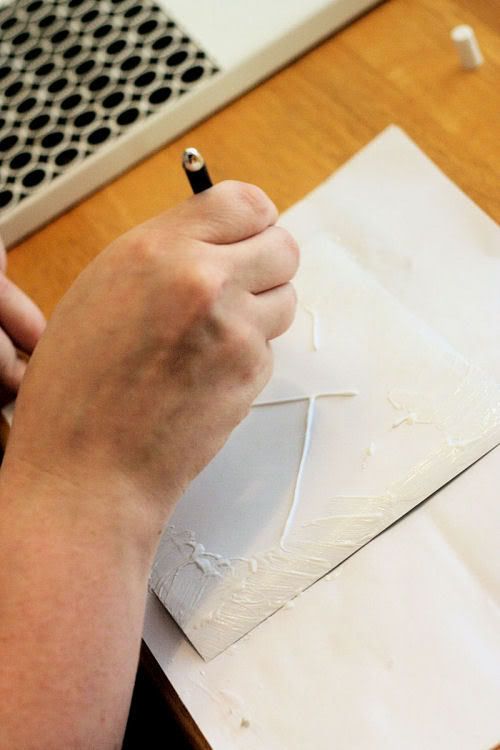
Position your paper onto the canvas, making sure to line up all edges so they are straight.
STEP 4:
Rub down the paper until it is stuck down to the canvas.
*Note, the paper will be all bubbly and look terrible...trust me, it will dry flat with no bubbles!!
STEP 5:
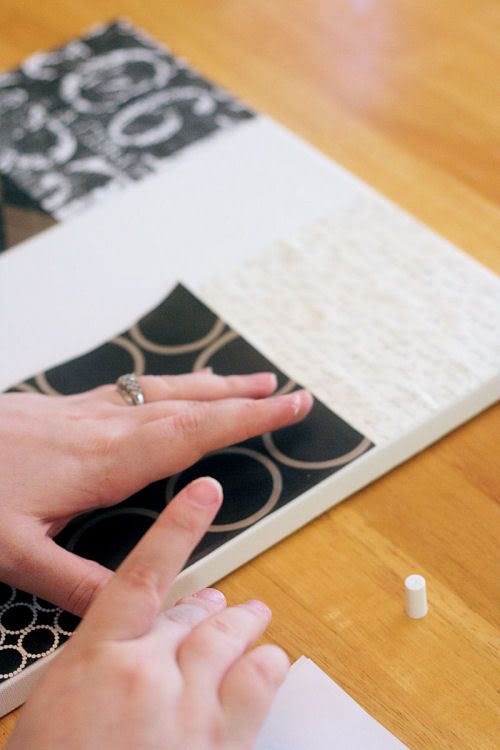
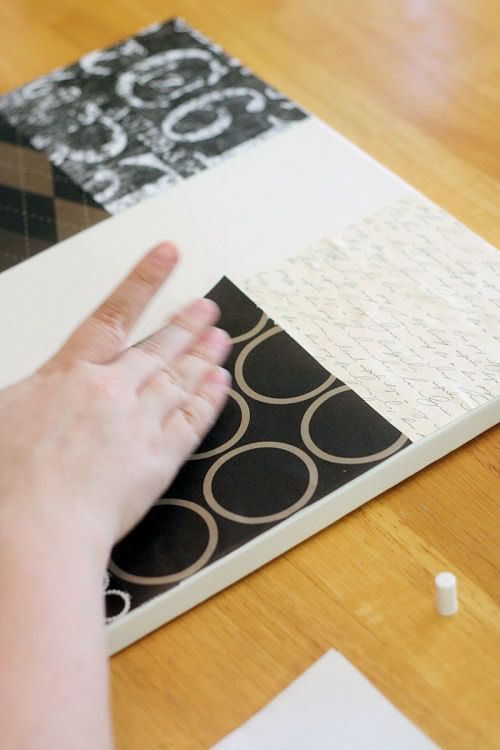
Continue to overlap patterns until your entire canvas is filled.
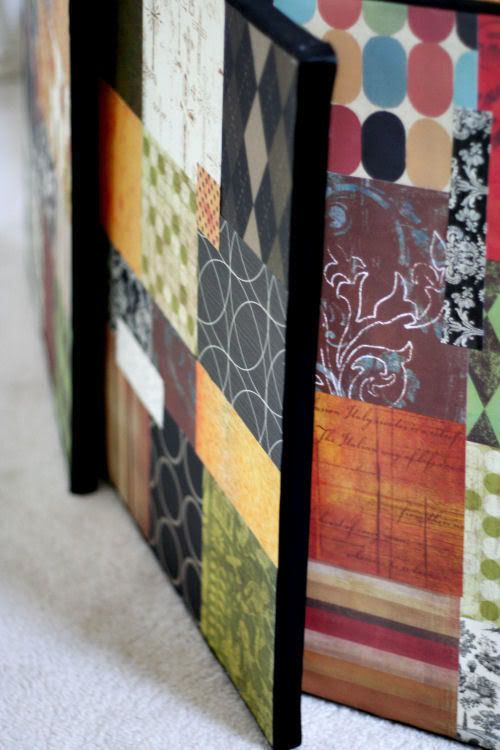
STEP 6:
When your canvas is done being covered in paper, measure out your ribbon and hot glue around the edge, taking care to press the ribbon down with a paper towel so you don't burn your fingers!
STEP 7:
Allow your project to dry for at least 24 hours before you hang it on the wall! And Voila, your finished! Now, I made 8 of these and will be hanging them soon (I haven't found the time to level them all out!!)
I will be sure to post them as soon as they are up on the wall! :)
And hey, if you make them, let me know! I have been working on a project for us to be able to share our crafts together.
**How to buy Ribbon: You will need to measure this to specifically fit your canvas, I just took my canvas to the fabric department in Hobby Lobby and picked one that fit the width, then measured around and bought a 1/2 yard extra for safe measure!


30 comments:
Fabulous job! I like that you can use it to match any decor! I'm going to link to this in today's Daily DIY. It's a great tutorial!
Very cute! I love it. Can't wait to see it hanging up!!
Wow, thanks for the step by step instruction...love that!
Brandee :-)
What a great project and your blog is so cute! Thanks for stopping by and visiting me! I am off to peek aorund your blog a little more! Jen R
Hey cute Nikki! Thanks for your comment! I looked at your clever blog a few weeks ago-so creative! I am just down the road from you! Fancy that! We're neighbors! I will come and visit your blog more often!
I'm looking forward to the reveal!
You did an amazing job! Thank you so much for sharing! I will be going to Hobby Lobby tomorrow..:-) Lori
Wow, this looks like another project that *I* could actually do! lol
I am actually working on a canvas/scrapbook paper/monogram project right now...I painted the canvas yesterday and will add the scrap paper and letter today...should be interesting, as I am new to crafting!
If I hate the way my painted edges look, I can add ribbon...thanks for that idea! Plus, I was just going to use one piece of paper, but maybe now I will use more pieces...will have to see what I have on hand.
Thanks-thanks-thanks!!! I love when nice people like you post these projects on their blogs :)
Bella
PS: What did you end up doing with your birdcage?
Hi Nikki,
This is a great project! And I love all your clear directions. i would not have known to use fabric glue!
I may have to try this one.
Have a great day,
diane
Oh how pretty! I have been trying to incorporate more scrapbook paper in my home decor. It's inexpensive and when your style change it's an easy fix!
Thanks for stopping by my blog today! I love hearing from everyone and meeting new readers!
Have a great day!
Kim
This looks so great! I can't wait to see them all hung on your wall!!
Cute project...those look great and I can't wait to see where you display them.
What a fabulous idea! I love the impact each canvas makes. I will be sure to give this one a whirl. I'm so jealous you have a Hobby Lobby. I swear everyone has a Hobby Lobby except for me!
Thanks for visiting my blog!!
This is really and truly fabulous! If I had any wallspace left... I'd do it in a heartbeat!
Aww, thanks so much for adding the link! Your project was specifically mentioned in the comments on that post. People really liked it!
Hi Nikki,
Thanks so much for stopping in and leaving a comment on my blog...I'm so glad you did because I love your blog! I'm putting you on my google reader right now!
Hey I love the canvas art you did-my head is spinning with "ideas"
Take Care,
Robin~♥
these are gorgeous! and what inexpensive artwork to grace big empty walls! gotta get on that!
Can't wait to see where you display them...I think I'll try this project too:)....thanks...
Oh wow! I love that! I'll definitely be using it as an art project for my kiddos!! Thanks for the instruction!
That is so cute, I love it. I loved you being vulnerable post too. I think we all feel inadequate as mothers. It's good to be reminded once in a while just how lucky we are! Thanks for reminding me :)
Great tutorial Nikki! Did you try Modge Podge? I used it on my canvas project and it seemed to hold ok...Good to know there's another option with the fabric glue, did you use a particular brand? Love your canvas, looks great, now I want to make an all paper one :)
This is such a great idea. I have been looking for something to make to put up in my daughters room. I think this will be perfect. Love it !
What a fun art project you shared! Thanks hun! Happy almost the weekend to you! Leslie
What a fun art project you shared! Thanks hun! Happy almost the weekend to you! Leslie
Oooh, that looks so neat! I want to make one of these, but first I need to figure out where I could put it. I really like the finished edge the ribbon gives it. Very nice!
~ Sarah
Great idea! I love the collage look. You are so talented!
Aww thanks girls! your all so sweet!!
I acutally used two different brands of fabric glue, so you can use any kind I would guess.
I did try the modge podge, but it didnt work very well for me! :(
This is so fun... may make a few for my classroom. Need to find a way to do this on cork board so mine isn't so ugly :(
Hey NIKKI!
Thanks for visiting my fledgling blog...I love it when I see new faces. Because then I get to follow them home and see where they blog. And boy is it ever GREAT here! I love this project and I think I'm gonna give this one a try. It's such a great idea and it turns out beautifully!!
Hey NIKKI!
Thanks for visiting my fledgling blog...I love it when I see new faces. Because then I get to follow them home and see where they blog. And boy is it ever GREAT here! I love this project and I think I'm gonna give this one a try. It's such a great idea and it turns out beautifully!!
Post a Comment